Hanging lights above a kitchen island aren’t just functional, they’re the difference between a kitchen that works and one that flows. The right fixtures set the tone for your entire cooking space, provide task lighting where you actually need it, and pull your kitchen’s design together. Whether you’re upgrading an existing island or starting fresh, choosing the right hanging kitchen island lighting requires more than picking something pretty. You’ll need to consider style, height, electrical infrastructure, and how these fixtures interact with your overall kitchen lighting scheme. This guide walks you through everything: from popular styles and materials to installation best practices and design integration.
Table of Contents
ToggleKey Takeaways
- Hang kitchen island lighting 30 to 36 inches above the countertop to avoid glare, shadows, and blocked sightlines while optimizing task lighting.
- Pendant lights remain the most versatile choice for hanging kitchen island lighting, working seamlessly across farmhouse, modern, industrial, and transitional design styles.
- Island length determines fixture count: 24–30 inches wide needs one light, 30–48 inches needs two, and 48+ inches typically requires three fixtures spaced evenly.
- Metal finishes like matte black, brushed brass, and oil-rubbed bronze coordinate with your faucets and cabinet hardware to create a cohesive kitchen design.
- Layer your island pendants with ambient ceiling lights and accent lighting, and use dimmer switches to transition between task-focused cooking and gathering-friendly moods.
- Always confirm electrical rough-in location before installation, and hire a licensed electrician for new wiring, junction box relocation, or any code-compliance work.
Popular Hanging Lighting Styles for Kitchen Islands
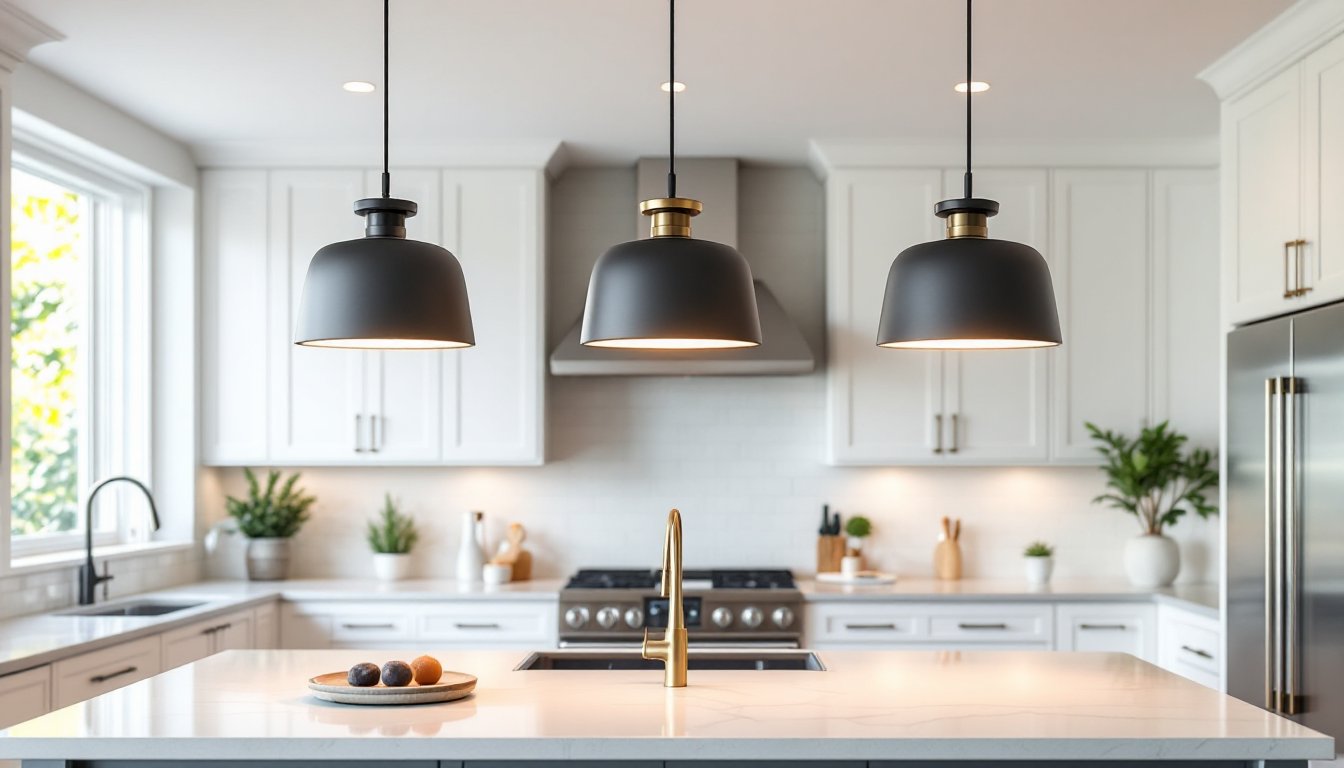
Kitchen island hanging lights come in a handful of proven styles, and each serves different design goals. Pendant lights remain the most versatile choice, single or grouped fixtures that hang from chains or rods. They work in farmhouse, modern, industrial, and transitional kitchens alike. A trio of matching pendants is the traditional approach, though asymmetrical arrangements are gaining traction.
Mini pendants offer a sleeker, more compact option ideal for smaller islands or tight spaces. These scale-down versions deliver the same visual impact without visual bulk. Track lighting lets you adjust fixture positions after installation, perfect if your island layout might shift or if you need flexible task lighting. Chandeliers work over larger islands and make a bold statement, especially in modern farmhouse or eclectic kitchens. Bar lights (linear fixtures with multiple small globes) provide diffused illumination and suit contemporary designs.
When deciding which style fits your kitchen, start by assessing your island’s size and your kitchen’s existing aesthetic. A small island over 24 inches wide usually handles one or two pendants well: anything wider typically benefits from three fixtures spaced evenly. Design inspiration from kitchen island lighting ideas shows that modern kitchens lean toward minimalist pendants or geometric shapes, while transitional spaces often favor classic dome or schoolhouse-style shades.
Design Finishes and Materials to Consider
Material choice affects both aesthetics and durability. Metal finishes dominate kitchen lighting: matte black offers sleek contemporary appeal, brushed brass brings warmth, polished chrome feels crisp and clean, and oil-rubbed bronze works in transitional and rustic schemes. These finishes age differently, brass and oil-rubbed bronze patina over time, while chrome stays consistent.
Glass shades (clear, frosted, or colored) control light diffusion. Clear glass shows off the bulb and works best with decorative filament bulbs or Edison-style LEDs. Frosted glass softens light output, reducing glare during tasks. Opal glass diffuses light evenly, excellent for task-heavy areas. Colored glass makes a design statement but can cast tints on food and surfaces: test this before committing.
Ceramic or metal dome shades provide classic styling and direct light downward effectively. Wood accents (especially in farmhouse designs) must be high-quality and treated for kitchen humidity. Avoid cheap veneer that delaminates near steam sources.
Hardware matters too. Rods (rigid) work best for heavy fixtures or precise alignment: chains allow slight adjustment and suit casual styles. Small pendant lights for kitchens come in virtually every material combination imaginable, so material-finish pairing is largely personal preference. Consider how finishes in your island fixtures coordinate with faucet hardware, cabinet handles, and appliances to avoid a scattered look.
How to Determine the Right Height and Number of Fixtures
Height is critical, get this wrong and you’ll have shadows, glare, or blocked sightlines. The standard rule: hang fixtures 30 to 36 inches above the island countertop. This clears most adults’ sight lines and places light roughly where you’re working without harsh glare. If your island has a tall seating area with bar stools, aim for the higher end (36 inches) to avoid blinding people seated at the bar. Low-ceilinged kitchens (under 8 feet) may need fixtures hung lower to avoid crowding: consult a designer if ceiling height is under 7 feet.
Number of fixtures depends on island length. A rough guide: islands 24 to 30 inches wide need one fixture centered: 30 to 48 inches wide typically work with two fixtures: 48+ inches usually require three. This spacing (roughly 24 to 30 inches on center) prevents dark spots while avoiding visual clutter. Asymmetrical arrangements, two fixtures offset from center, or one larger fixture paired with a smaller one, work if your kitchen’s design leans modern or eclectic.
Before hanging anything, confirm electrical rough-in location (where the outlet/junction box sits in the ceiling). Fixtures should align directly above or very close to this box. If the box is poorly positioned for your preferred fixture count, you’ll either need to hire an electrician to relocate it or compromise on spacing. Adjustable pendant lighting designs let you finesse positioning slightly, easing this issue. Always measure twice, measure your island length and your ceiling-to-counter distance before ordering fixtures or scheduling installation.
Installation Tips and Best Practices
Installation difficulty depends on existing electrical infrastructure. If your kitchen already has a ceiling junction box above the island, hanging fixtures is straightforward DIY work. If you need to run new wiring or add a box, that’s licensed electrician territory in most jurisdictions, never skip this step. Building codes (NEC standards) require proper support for hanging fixtures and correct wire gauge for load. A pro will ensure everything’s up to code and safe.
Preparation is half the battle. Cut power to the existing circuit at the breaker. Use a stud finder and confirm there’s no joist (ceiling framing) directly in your hanging path, fixtures should hang from the ceiling structure, not just drywall. If repositioning is needed, an electrician can relocate the junction box to sit directly under a joist.
When hanging fixtures, wear safety glasses and gloves. Most pendant kits come with a mounting bracket, canopy (the cover that hides the ceiling), and hanging hardware. Install the bracket first, securing it firmly to the ceiling structure. Thread wires through the chain or rod, make connections in the junction box using appropriate wire connectors, and wrap with electrical tape. Seal the canopy against the ceiling to hide the junction and prevent drafts. Use the mounting nut (usually provided) to secure everything flush.
For grouped fixtures, use a simple jig: measure the spacing, mark ceiling positions with a pencil, and install each bracket sequentially. Uneven spacing jumps out immediately once bulbs are on, so precision matters. Leave slack in wires, you’ll thank yourself if fixtures ever need adjustment. Test everything before calling the job complete, and take photos of your electrical work for future reference.
Integrating Hanging Lights With Your Kitchen’s Overall Lighting Plan
Island pendants shouldn’t be your kitchen’s only light source. Effective kitchen lighting layers task, ambient, and accent light. Task lighting is what island pendants do, they illuminate the work surface directly below. Ambient lighting (usually recessed ceiling lights or a general flush-mount) fills the whole room evenly. Accent lighting highlights features like artwork, open shelving, or architectural details.
For a well-lit kitchen, zone your lighting circuits so island pendants, overhead ambient lights, and other fixtures can be controlled independently. Dimmer switches on island pendants let you adjust mood during dinner while keeping work surfaces visible. This flexibility transforms the space from task-focused to gathering-friendly.
Consider how modern kitchen lighting styles balance multiple fixture types. Your island pendants should complement, not dominate. If pendants are bold and decorative, keep ambient ceiling lights simple and recessed. If pendants are minimal, ambient lights can be more prominent. Wall sconces above counters add extra task light without visual competition. Under-cabinet lighting (strip LEDs) brightens countertops where pendants cast shadows, a practical addition most designers recommend.
Light temperature (measured in Kelvins) matters too. Kitchen task areas typically use 3000K to 4000K (warm to neutral white), which feels natural near food and doesn’t distort color. Avoid very warm (2700K) or very cool (5000K+) extremes in primary task areas, as they skew how ingredients look. Test your chosen fixtures with sample bulbs before final installation: LEDs vary in warmth, and what looks great in a showroom might feel wrong in your space. Consistency across your kitchen’s lighting fixtures prevents mismatched tones and enhances overall cohesion.
Conclusion
Hanging kitchen island lighting ties your kitchen together visually and functionally. The right fixtures brighten your work area, complement your design aesthetic, and make cooking and gathering more enjoyable. Focus on proper height and spacing, choose finishes and materials that match your kitchen’s character, and plan your fixture installation around existing electrical infrastructure. Pair island pendants with ambient and accent lighting for a well-rounded, flexible lighting scheme. When in doubt about electrical work or ceiling modifications, bring in a licensed electrician, it’s the safest and smartest move. Your kitchen’s lighting investment will serve you well for years to come.