Kitchen island lighting isn’t just about visibility, it’s the backbone of a functional, welcoming kitchen. A poorly lit island becomes a dark, awkward workspace: the right fixtures transform it into a focal point that combines task lighting with ambient appeal. Whether you’re renovating or upgrading your existing setup, understanding how to select, size, and install kitchen island lighting fixtures matters more than most homeowners realize. This guide walks you through the essential decisions: how many pendants you need, how far apart they should hang, which styles work best for your space, and the common pitfalls that lead to disappointing results. By the end, you’ll have a clear roadmap to install lighting that looks sharp and actually works.
Table of Contents
ToggleKey Takeaways
- Kitchen island lighting serves three critical functions: task lighting for safe food prep, ambient light for an inviting space, and a design element that ties your kitchen’s style together.
- Hang pendant lights 30–36 inches above the countertop to deliver shadow-free illumination while maintaining clear sightlines for movement and conversation.
- Size pendants with a diameter roughly 1/4 to 1/3 of your island’s width, and use this spacing formula: islands under 4 feet need one pendant, 4–6 feet need two, and 6–8 feet need three.
- Match your kitchen island lighting fixtures to your kitchen’s existing hardware, faucet finish, and cabinet style—mismatched finishes like chrome pendants over bronze hardware look out of place.
- Avoid common mistakes like cramming too many small pendants, hanging them at different heights, or ignoring electrical reality; hire a licensed electrician for new wiring to ensure code compliance.
- Layer your island lighting with overhead or recessed fixtures rather than relying on pendants alone to illuminate the entire kitchen.
Why Kitchen Island Lighting Matters
Proper kitchen island lighting serves three distinct jobs: it illuminates your workspace so you can chop, prep, and cook safely: it provides ambient light that makes the kitchen feel open and inviting: and it acts as a design element that ties your kitchen’s style together. Without adequate task lighting over the island, you’re forced to work in your own shadow, even if overhead ceiling fixtures are present. Pendant lights positioned 30–36 inches above the countertop deliver direct, shadow-free illumination for chopping vegetables or reading recipes.
Island lighting also affects how the kitchen feels as a social space. A well-lit island becomes a natural gathering point, the place where family members chat while you cook, where assignments gets done, where guests set down appetizers during a dinner party. Poor lighting makes the island feel isolated or gloomy, disconnecting it from the rest of your kitchen’s flow.
Cost-wise, a thoughtfully planned lighting scheme reduces the need for additional under-cabinet or overhead fixtures later. Get it right during installation, and you won’t be retrofitting or adding bands of LED tape after the fact. This is one of those projects where planning ahead saves both money and frustration.
Choosing the Right Type of Kitchen Island Lighting
Before you pick fixtures, understand the main categories available to you. Your choice depends on your island’s size, your kitchen’s ceiling height, and your design goals.
Pendant Lights vs. Linear and Track Lighting
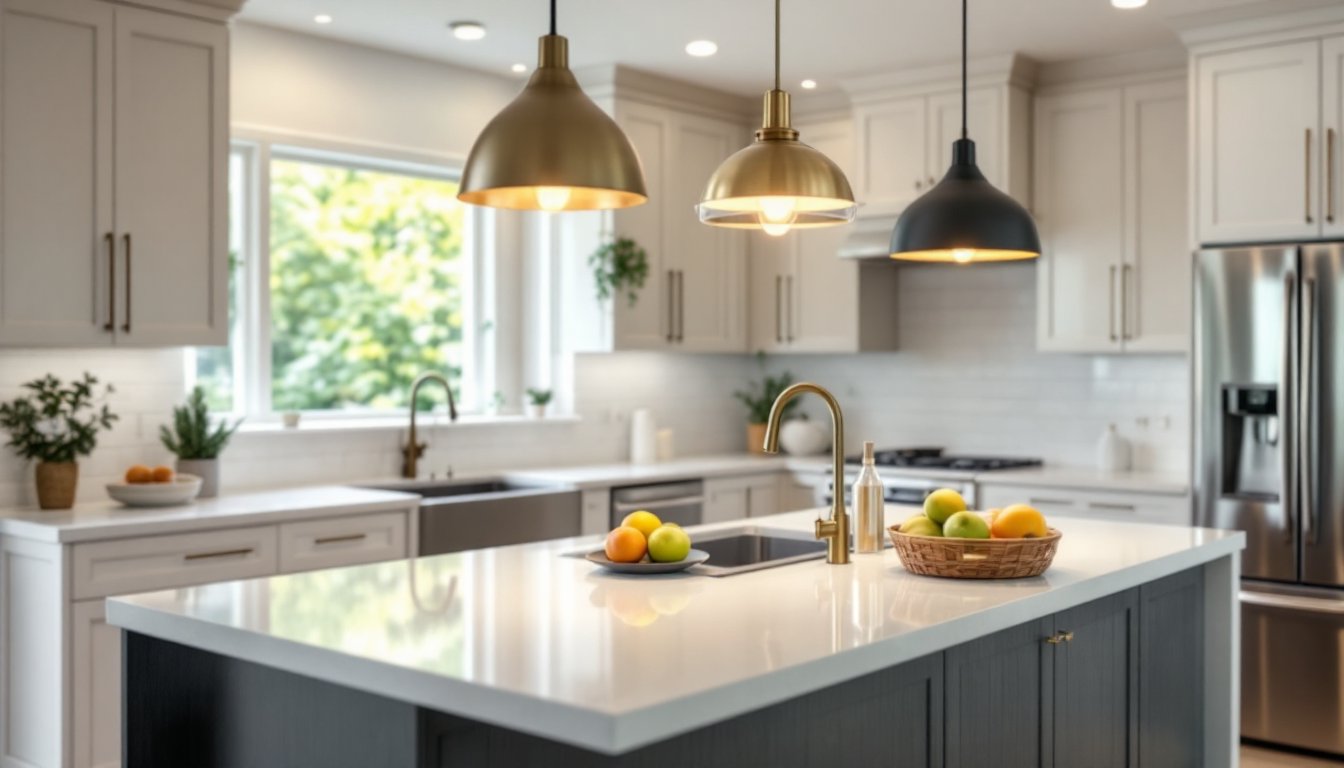
Pendant lights are the most popular choice for islands and come in countless styles: glass, metal, fabric, ceramic, or mixed materials. They hang from a single cord or stem, offer focused downward light, and work well for islands 3 to 5 feet long. For islands 5–7 feet or longer, two or three pendants create better light distribution. Small pendant lights deliver concentrated task lighting without overwhelming a compact space, while larger statement pendants define a modern or traditional aesthetic.
Linear fixtures, bars or strips of light, distribute illumination evenly across the entire island surface. These work beautifully for longer islands or open-concept kitchens where you want uniform, continuous coverage. They integrate seamlessly into contemporary and minimalist designs.
Track lighting offers flexibility: adjustable fixtures let you redirect light as your needs change. If your island hosts multiple tasks (prep work, dining, assignments), pendant track lighting gives you the control to spotlight different zones. Tracks do require ceiling access and may need an electrician’s help, but the payoff is adaptability.
When selecting between these options, consider island length. A 4-foot island typically needs one large pendant or two smaller ones. A 6-foot island works best with two or three pendants spaced evenly. For islands longer than 7 feet, linear fixtures or multiple pendants on a track become more practical than scattered single pendants.
Kitchen Island Lighting Ideas by Style
Your island’s fixtures should complement both your kitchen’s cabinetry and countertop materials, as well as the rest of your home’s décor. Here’s how to match fixtures to common styles:
Modern/Minimalist: Clear glass pendant lighting or sleek metal fixtures in matte black, brushed brass, or chrome. Straight lines, geometric shapes, and industrial materials (steel, aluminum) define this look.
Farmhouse/Rustic: Wrought iron or painted metal with warm finishes. Barn-style or cage-design pendants work beautifully. Pair with natural wood or reclaimed cabinetry.
Transitional: Neutral finishes (brushed nickel, oil-rubbed bronze) that blend contemporary and traditional elements. Look for fixtures that work as design statements without being too bold.
Traditional/Formal: Tiffany pendant lighting or ornate brass fixtures with amber or frosted glass. Elaborate designs signal craftsmanship and classic taste.
Eclectic/Bohemian: Mixed materials, varied heights, and artisanal finishes. Woven, ceramic, or hand-blown glass elements add personality.
The rule: don’t clash with your existing hardware, faucet finish, or cabinet style. If your kitchen has oil-rubbed bronze cabinet pulls and a bronze faucet, chrome pendants will look out of place. HGTV or Remodelista’s roundup of sculptural kitchen pendants for visual inspiration tied to your style.
Sizing, Spacing, and Installation Best Practices
Correct sizing and spacing prevent a common disaster: pendants that look too small, too large, or oddly spaced over the island.
Pendant Size: Choose fixtures with a diameter roughly 1/4 to 1/3 of your island’s width. A 36-inch-wide island pairs well with 8–12-inch-diameter pendants. Oversized statement pendants (16 inches or more) demand a spacious island and high ceiling: they’ll overwhelm a cozy 3×4-foot island.
Spacing from the Wall: When your island is positioned parallel to a wall, center the pendant group over the island. This maintains visual balance and ensures even task lighting across the surface.
Number of Pendants: Use this formula as a guide: islands under 4 feet long need one pendant: 4 to 6 feet need two: 6 to 8 feet need three. Position multiple pendants so the distance between their centers equals the distance from the end pendant to the nearest island edge. For a 5-foot island with two pendants, space them 30 inches apart, with 10 inches from each pendant to the island’s end.
How High Should Kitchen Island Pendants Hang?
Pendant height is critical for both safety and function. Fixtures that hang too low obstruct sightlines across the kitchen: too high and they fail to deliver focused task light.
Standard height: 30 to 36 inches from the countertop to the bottom of the fixture. This distance keeps light concentrated on the island work surface while maintaining clear sightlines for conversation and movement around the kitchen.
If your ceiling is lower (8 feet or less), 30 inches is safer. High ceilings (9+ feet) allow 36 inches or even more. Measure your ceiling-to-countertop distance and test the hang height before permanently installing. Some fixtures come with adjustable cord or chain: use this feature to get the height exactly right.
Install considerations: Ceiling-mounted fixtures require working around joists and potentially running new electrical circuits from your panel. This is not a plug-and-play task. Hire a licensed electrician for any new wiring, especially if adding circuits. Existing light fixtures can sometimes be rewired if the junction box is sturdy and accessible, but code compliance varies by jurisdiction.
Choose fixtures rated for damp or wet locations if your kitchen has high moisture or steam from cooking. Standard residential pendants work in most kitchens, but verify the fixture rating on its label.
Common Mistakes to Avoid
Even experienced DIYers stumble on island lighting. Here are the traps to sidestep:
Too Many Small Pendants: Cramming four tiny pendants over a 5-foot island looks cluttered, not elegant. Stick to the sizing formula above.
Mismatched Heights: If using multiple pendants, they must hang at the same level. Uneven pendant heights create visual disorder and uneven lighting. Use an adjustable chain or stem to match them precisely.
Ignoring Electrical Reality: Not every kitchen has a convenient junction box above the island. Running wire through joists or across a ceiling often demands rerouting through walls, fishing new wire, or calling an electrician. Budget time and money for this upfront.
Poor Dimmer Setup: Island pendants benefit hugely from dimmer switches, but not all bulbs and fixtures play nice with dimmers. Incandescent bulbs dim smoothly: LED bulbs need a compatible dimmer (many standard dimmers don’t). Match your bulb type to your dimmer.
Forgetting About Maintenance: Pendant fixtures collect dust on their inner surfaces, reducing light output over months. Choose designs you can easily wipe clean, clear glass beats enclosed, hard-to-reach crevices.
Think about kitchen lighting ideas holistically. Island lighting is one piece of a larger puzzle that includes overhead fixtures, under-cabinet strips, and natural light. An island alone can’t light your entire kitchen, don’t ask it to. Pair pendants with overhead or recessed fixtures to create layered, adaptable illumination.
For compact kitchens, explore small kitchen lighting ideas that maximize vertical space and minimize visual clutter. Pendant and track options both work, but scale and placement matter even more in tight quarters.