
Kitchen cabinet lighting isn’t just about visibility, it’s the difference between a functional space and one that feels intentional and inviting. Whether you’re prepping dinner or showcasing your best dishware, the right lighting elevates both function and style. Modern homeowners have more options than ever, from energy-efficient LED strips tucked beneath cabinets to ambient lighting above them. This guide walks you through practical cabinet lighting solutions, installation considerations, and design choices that work for real kitchens, not just magazine spreads.
Table of Contents
ToggleKey Takeaways
- Kitchen cabinet lighting elevates both function and style by eliminating shadows, reducing eye strain during food prep, and making spaces feel larger and more intentional.
- LED strip lights are the best under-cabinet solution due to their low-profile design, energy efficiency, and ability to warm or cool color temperature; choose a CRI rating of 90+ to ensure colors appear true.
- Above-cabinet lighting creates a halo effect that makes ceilings feel taller and adds ambient glow; puck lights spaced 12–18 inches apart offer more control and easier maintenance than continuous strips.
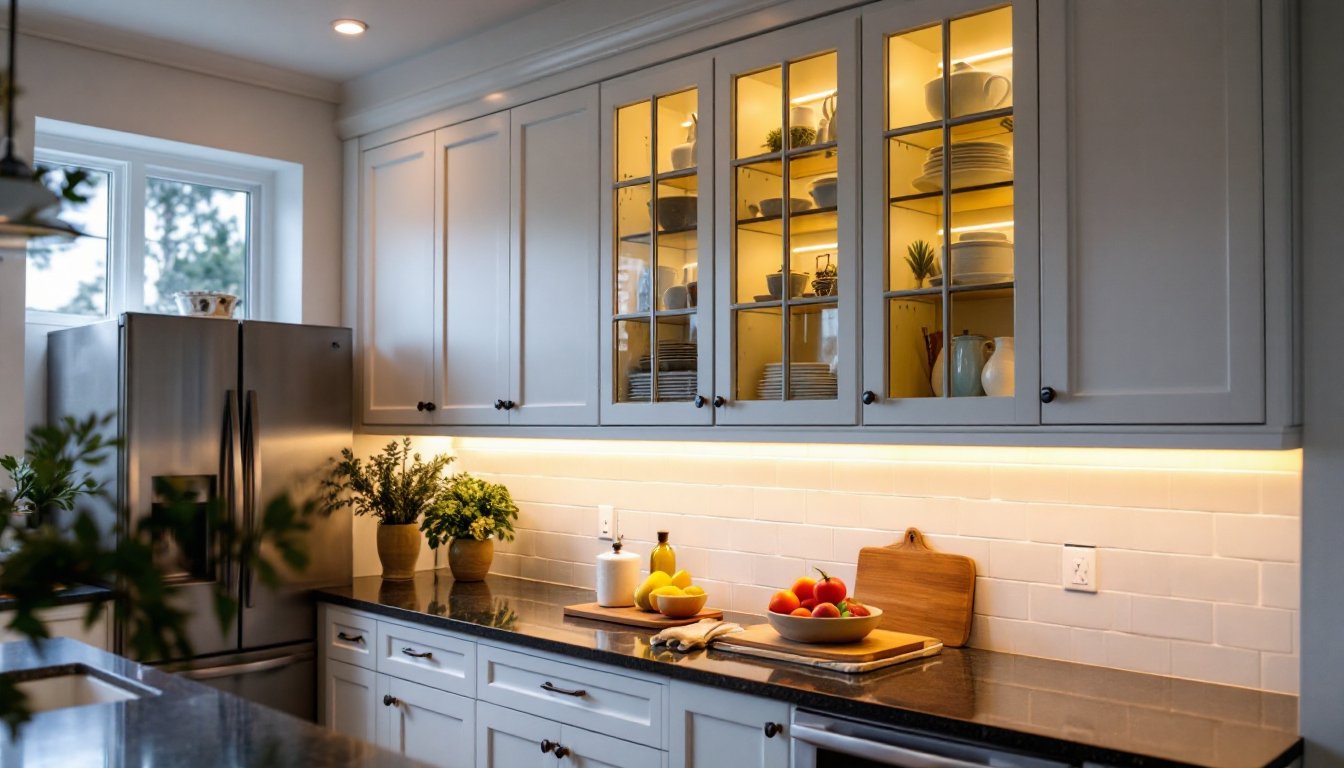
- For open shelving and glass-front cabinets, install slim LED bars pointing downward at 12–24 inch intervals to showcase dishware and decorative items without harsh shadows.
- Proper surface preparation, multiple measurements, careful electrical routing, and consistent color temperature across all cabinet lighting layers ensure a polished, professional result without over-lighting.
- Dimmable, warm white LEDs (2700K–3000K) layered with under-cabinet task lighting and above-cabinet ambient lighting transform kitchens into well-designed, functional spaces accessible to DIY installers.
Why Kitchen Cabinet Lighting Matters
Adequate cabinet lighting does heavy lifting in a kitchen. It eliminates shadows over work surfaces, making food prep safer and reducing eye strain while you’re chopping, mixing, or reading recipes. Beyond safety, it changes how your space feels, warm, layered lighting creates ambiance that overhead fixtures alone can’t achieve.
From a practical standpoint, task lighting makes the difference between a well-lit prep zone and a dim corner where you’re constantly adjusting your angle to see what you’re doing. Add in the ability to showcase open shelving or glass-front cabinets, and lighting becomes a design element that highlights your kitchen’s strengths. Properly lit cabinets also make your kitchen feel larger and more open, especially in smaller spaces where every visual trick counts.
Most kitchens rely on a single ceiling fixture or recessed lights, leaving under-counter work areas in shadow. Adding cabinet lighting breaks that pattern, letting homeowners layer their lighting design like professionals do. It’s not fancy, it’s smart planning that pays dividends every time you use your kitchen.
Under-Cabinet Lighting Solutions
LED Strip Lights for Functional Illumination
LED strip lights are the go-to choice for under-cabinet applications, and for good reason. They’re low-profile, energy-efficient, and come in warm or cool color temperatures to match your kitchen’s vibe. Warm white (2700K–3000K) creates a cozy feel, while cool white (4000K–5000K) mimics daylight and works well for task areas.
When selecting strips, look for high CRI (Color Rendering Index) ratings of 90 or above. This means colors, especially food and cabinet finishes, appear true, not washed out or sickly. A strip rated CRI 80 might seem similar in brightness but will look noticeably dull when comparing colors side by side.
Installation is straightforward: clean the cabinet’s underside thoroughly with a degreaser (oil buildup kills adhesion), measure twice, and apply the self-adhesive strip along the front edge. Run wires along the inside of the cabinet frame or along the wall to a nearby outlet or hardwired connection. If you’re not comfortable with electrical work, hiring a licensed electrician for hardwiring is worth the cost, it’s safer and looks cleaner than outlet cords snaking across your backsplash.
Installing Under Cabinet Lighting should take one to two hours per cabinet run, depending on wire routing and whether you’re adding dimmers. Most homeowners can handle this without tools beyond a drill and a level.
Consider dimmable strips if your budget allows, they let you adjust brightness for different times of day and tasks. A motion sensor option works well for pantries or lower cabinets you access less frequently, reducing energy use without sacrificing convenience.
Above-Cabinet Lighting for Ambient Style
Above-cabinet lighting sits on top of cabinets, pointing up toward the ceiling or down into the space above. This creates a halo effect that makes ceilings feel taller and adds a layer of ambient light without harsh shadows.
LED strip lights work here too, or you can go with puck lights, small, round fixtures spaced 12–18 inches apart. Pucks offer more control over light distribution and look intentional, like a designer made a deliberate choice. They’re also easier to replace if one fails, versus diagnosing a fault in a continuous strip.
Color temperature matters less for above-cabinet lights since they’re indirect, but stick with warm white to keep the overall kitchen feeling cohesive and welcoming. This is where you can get creative: warm light bouncing off ceiling texture creates visual interest, especially in modern kitchens with minimal wall décor.
Paint the ceiling (or at least the area above cabinets) a matte finish or soft white to help light diffuse evenly. Gloss ceilings reflect light unevenly and can create glare. If you have open shelving between your upper cabinets and the ceiling, use above-cabinet lighting to avoid dark patches that make the space feel closed-in.
Modern Farmhouse Dining Room Lighting uses similar layering techniques to create inviting ambient spaces, the principle translates directly to kitchens where you want warmth alongside function.
Open Shelving and Display Cabinet Lighting
If you have glass-front cabinets or open shelving, lighting becomes a styling tool. Homeowners with dishware, cookbooks, or decorative items want them visible and attractive, not lurking in shadows.
The best approach is installing lights inside the cabinet or above the shelf. Slim LED bars (about 1 inch tall) mount to the top surface of the shelf above, pointing down. They’re barely noticeable but illuminate everything on the shelf below. Space them 12–24 inches apart depending on shelf depth and how even you want coverage.
If you prefer a more dramatic effect, mount lights on the underside of upper shelves, pointing down onto what’s below. This draws attention to your collection and works especially well for kitchens with 3–4 shelves stacked vertically. Avoid harsh bright-white lights here, warm white makes dishes and glassware look inviting, not like a retail display.
Wiring is your main consideration. Running wires inside the cabinet frame keeps everything tidy, but you’ll need access to an outlet or a hardwired connection. If access is difficult, battery-operated puck lights or strips eliminate the wire concern, though you’ll need to replace batteries periodically.
The Kitchn offers excellent ideas for styling open shelving, and lighting should be part of that plan from the start, not an afterthought. Good lighting makes styling choices look intentional rather than cluttered.
Installation Tips and Design Considerations
Preparation is everything. Clean surfaces thoroughly, dust, grease, and residue prevent adhesive strips from sticking. Use a degreaser or TSP (trisodium phosphate) solution, then wipe with a damp cloth and let dry completely before applying lights. Acetone works in a pinch if you’re in a hurry, but give it 30 seconds to evaporate.
Measure multiple times. Lay out your strips before adhesive touches the cabinet. Mark centerlines with a pencil if you’re installing puck lights, they should be evenly spaced for balanced illumination and a polished look. Uneven spacing jumps out, especially once lights are on.
Plan your electrical route beforehand. How will wires reach an outlet or junction box? Can they hide behind a backsplash? Run along inside the cabinet frame? Avoid routing wires across open countertops, they’re an eyesore and a tripping hazard. If you’re running wire through walls or to a hardwired connection, this is a good time to call an electrician. Local electrical codes (usually the NEC, National Electrical Code) may require GFCI protection in kitchens: an electrician ensures compliance.
Choose dimmer-compatible lights if possible. Dimmable LEDs cost a bit more but give you flexibility to set mood or reduce glare during different times of day. Not all LED strips are dimmable, check the spec sheet before buying. A standard dimmer may not work with all LED drivers, so match components carefully or buy a dimmer designed for your specific lights.
Consider color temperature across layers. If you’re adding under-cabinet, above-cabinet, and ambient lighting, use the same color temperature (2700K or 3000K for warmth) so nothing clashes. Mixing 2700K under-cabinet lights with 5000K above-cabinet lights creates a jarring effect.
Don’t over-light. More light isn’t always better. LED Strip Lighting Ideas can go overboard if you’re not careful. Aim for enough light to see your work safely and illuminate shelving, not so much that you’re squinting or feel like you’re in an operating room. Start with modest brightness and add more if needed, you can always increase, but repainting or replacing over-bright lighting is a hassle.
Conclusion
Kitchen cabinet lighting transforms how your space functions and feels. Whether you start with under-cabinet task lighting, add ambient glow above cabinets, or showcase open shelving with accent lights, the key is layering thoughtfully. LED technology makes it affordable and accessible for DIY installation, and the impact, better visibility, enhanced style, and a space that feels intentional, is worth the effort. Plan your layout, prep surfaces properly, and don’t skip the electrical details. A well-lit kitchen isn’t luxury: it’s practical good sense.


