
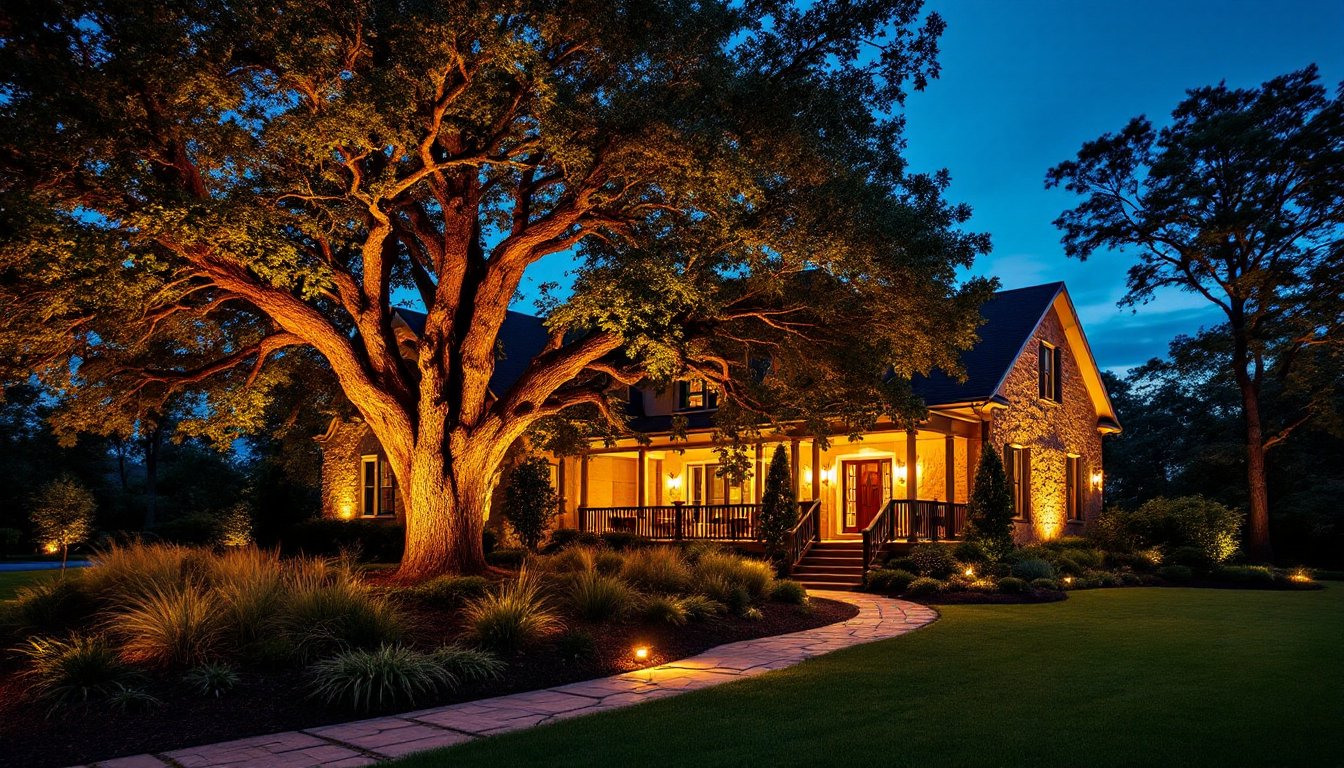
Outdoor up lighting might sound like a fancy lighting technique reserved for high-end landscapes, but it’s actually one of the most accessible and transformative upgrades a homeowner can tackle. By placing lights low to the ground and directing them upward, you create dramatic shadows, depth, and visual interest that makes your yard feel larger and more polished, especially when the sun sets. Whether you’re highlighting a mature oak tree, accentuating architectural details on your home’s facade, or creating ambient mood lighting for entertaining, outdoor uplighting delivers professional results without requiring a licensed electrician or deep pockets.
Table of Contents
ToggleKey Takeaways
- Outdoor up lighting is an accessible, transformative DIY upgrade that creates dramatic shadows and depth in your yard without requiring a licensed electrician or large budget.
- Modern LED outdoor uplighting fixtures use minimal energy and last 25,000–50,000 hours, making them a superior choice over outdated halogen options.
- Proper placement is critical: position uplighters 2–4 feet from focal points like trees or architectural features, angled to graze surfaces rather than blast them flat.
- Warm white (2700K) color temperature creates the most inviting residential feel, while creative placement along pathways, facades, and around water features elevates your landscape design.
- Outdoor up lighting requires minimal maintenance—monthly lens cleaning and wintertime corrosion checks are sufficient to keep fixtures working reliably for 10+ years.
What Is Outdoor Up Lighting and Why It Matters
Outdoor up lighting (also called uplighting) is simply a light source positioned at ground level pointing upward at a focal point, a tree, shrub, wall, or architectural feature. Unlike traditional landscape lighting that casts light downward for foot traffic, uplighting creates dramatic visual effects by mimicking how stage lights work in theaters.
This approach serves multiple purposes. It extends your outdoor living season by making your yard visually interesting after dark, increases perceived property value by highlighting architectural assets, and creates separation and layers in your landscape design. The interplay of light and shadow makes even modest yards feel more substantial. Plus, when guests arrive after sunset, professional-looking uplighting signals that your home is well-maintained and thoughtfully designed.
The best part? You don’t need a massive budget or complex wiring. Most modern setups use plug-in LED fixtures that draw minimal power, making them ideal for DIY installation around decks, patios, and planting beds.
Choosing the Right Up Lights for Your Space
Start by choosing fixtures rated for outdoor use, look for IP65 or higher ratings, which means they’re protected against water jets and dust. Aluminum or stainless steel housings hold up better than plastic in freeze-thaw cycles.
Wattage matters less than it used to. A 20-watt LED uplighter delivers equivalent brightness to a 150-watt halogen, using far less energy and generating minimal heat. Consider fixture beam width: narrow beams (15–30 degrees) create dramatic spotlighting on trees or architectural features, while wider beams (40–60 degrees) work better for general uplighting of larger areas or building facades.
Color temperature affects mood. Warm white (2700K) feels inviting for residential spaces and blends naturally with home lighting. Cool white (4000–5000K) looks more clinical and is better suited to commercial applications. Most homeowners stick with warm white for outdoor up lighting around living spaces.
LED vs. Traditional Fixtures: Which Is Best for Uplighting
LED uplighters have become the default choice, and for good reason. They run cool to the touch, last 25,000–50,000 hours (upward of 10 years in most residential use), and draw minimal electricity. Halogen uplighters, the older standard, burn hotter, fail faster, and spike your power draw if you’re running multiple units. If you already have halogen fixtures, LED retrofits exist, but replacing the whole unit is usually more practical.
For permanent installations buried in planting beds, LED is almost mandatory. For temporary display lighting or rental situations, battery-operated LED uplighters eliminate wiring entirely and cost $30–$80 per unit. Smart-enabled LED uplighters let you adjust color, brightness, and scheduling from your phone, though they cost more upfront ($100–$250 per fixture). Save those for focal points you’ll adjust frequently. Standard plug-in LED uplighters ($40–$100) handle 80% of residential projects just fine.
Installation Techniques for Maximum Visual Impact
Proper placement determines whether your uplighting looks intentional or accidental. Begin by walking your property at dusk and imagining which elements you want to highlight, usually trees, specimen shrubs, textured walls, arbors, or architectural features like cornices or chimneys.
For plug-in models, find an outdoor outlet (install a GFCI-protected outlet if you don’t have one near your target area, this is a safety requirement, not optional). Position the fixture 2–4 feet in front of and directly below your focal point. Aim it slightly toward the target, not straight up. The light should graze the surface you’re highlighting, not blast it flat.
For buried LED fixtures in soil or mulch, dig a small hole 2–3 inches deep and position the light at an angle: avoid pointing straight up, which washes out detail. Bury the cable in a shallow trench alongside a planting bed or under mulch. Use exterior-rated UV-resistant wire and staple or bury connectors so nothing protrudes and trips anyone. Never bury electrical connections: above-ground junction boxes must be weatherproof and properly sealed. If you’re unsure about electrical codes in your area, consult a licensed electrician, this is one area where mistakes aren’t cosmetic.
Placement Strategy for Trees, Plants, and Architectural Features
For trees, position the uplighter 4–6 feet away from the trunk, aimed upward to graze the canopy. Large specimen trees look best with 2–3 fixtures around the perimeter, creating dimensional lighting that shows off branch structure. Smaller ornamental trees need just one well-placed fixture.
Shrubs benefit from uplighting behind or to the side, which silhouettes foliage against your home’s facade. Plant specimens with interesting textures, boxwoods, ornamental grasses, evergreens with peeling bark, often photograph best when uplighting catches their form.
Architectural features like stone walls, wooden gates, or shutters deserve uplighting from 3–5 feet away at a 45-degree angle. This distance prevents glare and harsh shadows while showing off material texture. A rendered or stuccoed wall needs gentler, more diffuse light: a rough stone wall can handle more dramatic, angular illumination.
Avoid uplighting directly below windows or doors, it creates glare inside the home and wastes light. Similarly, don’t angle lights toward your property line: neighborly outdoor up lighting stays on your own property.
Design Ideas and Creative Applications
Modern outdoor up lighting goes beyond single-point spotlighting. Consider layering different fixture positions and beam widths to create visual rhythm.
Path uplighting is subtly powerful: place low-wattage fixtures along a walkway angled at 30 degrees to silhouette plantings alongside the path. This guides guests while adding ambient mood lighting, much more sophisticated than standard footlights.
Facade uplighting transforms your home’s exterior after dark. Aim multiple fixtures at different roof lines or wall sections at 45-degree angles to emphasize height and architectural interest. Warm white creates inviting, residential appeal: it’s what distinguishes well-lit homes from brutally lit commercial buildings.
Creative plant displays under eaves or within arbors look stunning when a single uplighter is hidden within the foliage, casting light upward and outward. Water features, ponds, fountains, streams, gain dimensionality with uplighting positioned behind plantings, adding depth and mystery. Recent garden design ideas from Gardenista showcase how uplighting transforms nighttime garden experiences, from intimate reading nooks to social gathering spaces.
For entertaining, string warm uplighting across your deck perimeter to create an outdoor room feel. This approach bridges the gap between ambient and accent lighting, making guests feel both comfortable and impressed. Most homeowners find that 2–3 well-placed uplighters plus some deck string lighting deliver restaurant-quality results.
Maintenance and Troubleshooting Tips
Outdoor up lighting requires minimal upkeep, but a few habits keep fixtures working and looking good for years.
Once monthly in spring through fall, wipe fixture lenses with a damp cloth to remove dust, pollen, and spider webs that dim output. For buried fixtures, trim back mulch and debris that accumulates around the lens. Check plug connections for corrosion and gently rub connectors with a soft, dry cloth if you notice flickering.
Winter is when problems surface. Salt spray near coastal properties and freeze-thaw cycles in cold climates can corrode fixtures and connections. In late fall, inspect all outdoor electrical connections and consider weatherproofing them with dielectric grease applied to connector ends, this simple step prevents ice formation inside connections.
Common troubleshooting: Dimming lights usually mean corroded connections or a failing bulb: reseat connections and test before replacing. Flickering indicates a loose wire or water intrusion in a connection junction, cut back the damaged portion, trim and reseal. Uneven illumination suggests the fixture has tilted: re-level it and stake it if necessary to prevent shifting. Lights won’t turn on after sitting dormant through winter, give rechargeable batteries a full charge cycle and test the timer if your fixtures have one.
If you’re running multiple uplighters on a single circuit, ensure the total wattage doesn’t exceed your outlet’s capacity (typically 1500 watts for a standard outdoor outlet). Modern LED fixtures run 15–30 watts each, so you can safely run 40–50 units on a single circuit without risk. For permanent installations, run dedicated circuits and have a licensed electrician handle any new outlets or circuit additions, this isn’t a place to improvise.
When integrating smart outdoor up lighting, update firmware annually and replace batteries in wireless control modules as needed. Many homeowners find that upgrading to best home lighting solutions with smart controls later improves flexibility without requiring initial overinvestment.
Seasonal adjustments matter too. Summer foliage is denser: you may need to reposition or add fixtures to maintain the uplighting effect. Fall pruning changes plant silhouettes, so check light angles after you trim. Snow and ice can block uplighters positioned at low angles, angle fixtures slightly more steeply in cold climates to prevent blockage.
Making Outdoor Up Lighting Work for Your Home
Outdoor up lighting transforms how your home looks after sunset and expands your living space into evening hours. The investment, typically $200–$800 for a functional system covering most residential properties, pays dividends in curb appeal, mood, and usable outdoor living time.
Start simple: install one or two well-placed uplighters on your home’s most prominent features, then expand as you refine what you like. Most homeowners discover they want more uplighting after experiencing the first installation, so building incrementally keeps costs manageable. Quality LED fixtures from reputable manufacturers hold up for a decade with minimal fuss, making this one of the more forgiving outdoor projects you can tackle yourself.


