
Charleston’s subtropical climate and historic architecture create a unique outdoor environment where the right lighting transforms both function and curb appeal. Whether you’re protecting pathways along brick courtyards, spotlighting ancient oaks, or adding ambiance to your patio, landscape lighting in Charleston requires thoughtful planning around the region’s humidity, salt spray, and afternoon thunderstorms. This guide walks you through the essentials, from understanding why climate matters to installing and maintaining fixtures that’ll stand up to Lowcountry conditions for years to come.
Table of Contents
ToggleKey Takeaways
- Landscape lighting in Charleston must withstand salt spray, humidity, and coastal weather—choosing stainless steel or powder-coated aluminum fixtures ensures durability in Lowcountry conditions.
- LED fixtures consume 80% less power and last 10+ years compared to halogen, making them the most cost-effective and reliable choice for Charleston homeowners over time.
- Path and step lights should use warm white LEDs (2700–3000K) at 1–3 watts with IP65 ratings to provide safe illumination while respecting Charleston’s historic aesthetic and neighborhood character.
- A standard 12-volt low-voltage transformer system (400 watts for a 0.25-acre lot) is ideal for DIY installation, requires no permit in most Charleston jurisdictions, and avoids shock hazards.
- Regular maintenance including quarterly lens cleaning, seasonal connection inspections, and annual vegetation trimming keeps landscape lighting performing reliably year-round in Charleston’s challenging climate.
Why Landscape Lighting Matters in Charleston’s Climate
Charleston’s subtropical humidity and salt air create challenges that standard landscape lighting must handle. Salt spray from coastal locations corrodes brass and steel fixtures rapidly: moisture and mold thrive in the dense summer atmosphere. Beyond durability, proper lighting extends your home’s usable hours, evening entertaining on a screened porch or illuminated pathways to a detached guest house become safe and inviting.
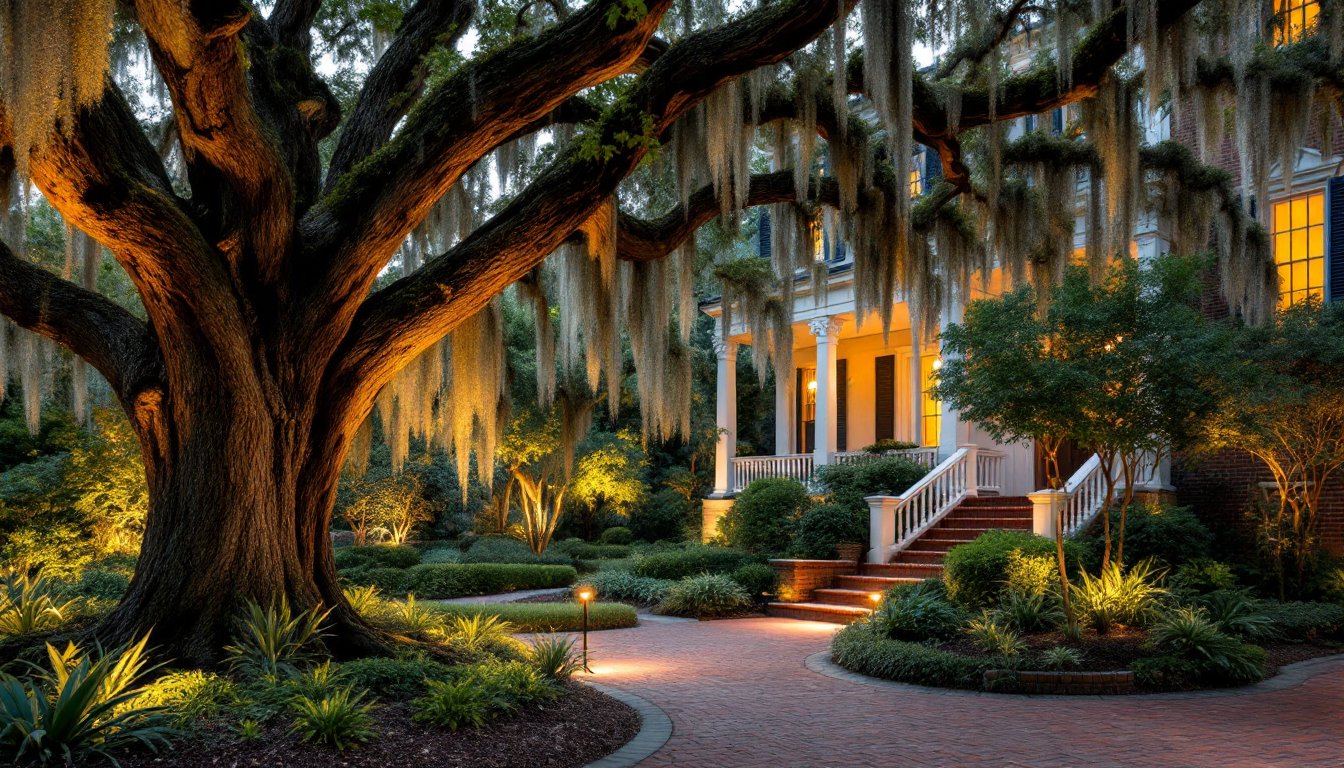
The region’s lush vegetation also affects lighting strategy. Live oaks draped in Spanish moss diffuse light beautifully when you place fixtures below canopies, while upward grazing across magnolia bark creates dramatic shadows. Charleston’s brief winter means year-round entertaining potential, so year-round reliability isn’t optional.
Safety is equally important. Coastal humidity creates slippery surfaces fast, and Charleston’s historic neighborhoods feature uneven walkways and brick stairs that demand proper illumination. Well-designed path lighting reduces trip hazards and deters unwanted activity. Finally, landscape lighting adds measurable property value in Charleston’s competitive real estate market, homes with thoughtful outdoor lighting command premium prices.
Types of Landscape Lighting for Charleston Homes
Path and Step Lights for Safety
Path lights, typically 4–12 inches tall with a stake or post-mount base, illuminate walkways and define circulation patterns. In Charleston, look for fixtures rated IP65 (dust and water tight) or better to handle humidity and occasional flooding. Brass and copper corrode in salt air: stainless steel or powder-coated aluminum resist longer.
Step lights mount flush into risers or the sides of stairs. Recessed fixtures sit edge-flush with minimal protrusion, reducing trip hazards. For Charleston’s brick and aggregate steps, drill pilot holes and use stainless steel fasteners to avoid rust staining.
Wattage matters here: LED path lights in the 1–3 watt range provide sufficient visibility without glare or light trespass into neighbors’ yards. Aim for a color temperature around 3000K (warm white), which feels welcoming and doesn’t attract insects as aggressively as brighter tones. Standard incandescent or halogen path lights consume more power and fail faster in high heat and humidity.
Accent and Uplighting for Curb Appeal
Uplifting trees, architectural details, and focal points creates visual interest and defines your landscape at night. Spot lights and flood lights, typically 10–50 watts depending on distance and desired intensity, graze texture or illuminate large trees. A 20-watt LED flood light can effectively uplight an oak tree 15–20 feet away: test placement and angle before finalizing installation.
Accent lighting draws attention to water features, specimen plants, or architectural elements. A single uplighter at the base of a crepe myrtle or magnolia transforms the tree into a nighttime focal point. Slate and stone walls respond beautifully to grazing light that emphasizes texture.
For Charleston homes with period details, pediments, columns, shutters, downlighting from eaves or pergolas creates refined shadow lines. Avoid overlighting: subtlety reads as more intentional. Use warm white LEDs (2700–3000K) to respect your home’s historic character and neighborhood compatibility. Cooler lights (4000K+) feel institutional and clash with Charleston’s aesthetic.
DIY Installation Tips for Charleston Homeowners
Most landscape lighting runs on 12-volt low-voltage systems, a transformer steps down standard 120-volt household current to a safer, more flexible standard. Low-voltage cable is easier to work with than line voltage, requires no permit in most Charleston jurisdictions (confirm with your building official), and reduces shock risk during installation.
Start with a rough sketch of pathways, trees, and focal points. Walk your yard at dusk and note where natural shadows occur and where you feel unsafe. This prevents over-lighting and helps you identify high-impact placement zones.
Installation checklist:
- Measure and plan wire routes. Use a landscape marking paint or chalk to trace where you’ll run cable. Avoid crossing frequently-mowed lawn: route along planting beds or under mulch instead.
- Install the transformer indoors or in a weatherproof cabinet. Never leave it exposed: humidity will destroy it in one season. A garage outlet with a weatherproof receptacle rated IP54 or better works well.
- Bury low-voltage cable 2–4 inches deep in planting beds or under mulch in open areas. Use a flat-bottomed spade to cut a clean slot, lay the cable, and fold the soil back over. No conduit needed unless cable crosses a walkway or driveway.
- Connect fixtures one at a time. Wiggle connectors to ensure positive contact: corrosion breaks connections fast in humid climates. Some installers wrap connections in waterproof dielectric grease.
- Test all fixtures before covering cable. A burned-out fixture in week three means digging again.
Pro tips: Use stainless steel landscape spikes instead of plastic: they resist corrosion and last longer. If your yard floods seasonally, elevate the transformer or install a GFCI outlet for added safety. Refer to a lighting layout tool to visualize spacing and wattage needs before you start digging.
Choosing the Right Fixtures and Power Options
LED dominates landscape lighting now, and for good reason: durability, energy efficiency, and reliability in heat and humidity. A quality LED landscape light costs $20–$60 upfront but consumes 80% less power and lasts 10+ years versus 1–2 years for halogen. Over time, the payoff is massive.
When shopping, look for fixtures rated for wet locations (IP65 or IP67) and materials matched to coastal conditions. Stainless steel and powder-coated cast aluminum resist salt spray far better than bare brass. Seals and gaskets should be silicone or EPDM rubber, not plastic, which hardens and fails in sun and heat.
Color temperature affects the feel of your landscape. 2700K (warm white) complements historic architecture and creates cozy outdoor seating areas. 3000K is a neutral warm tone that works anywhere. 4000K and above feel cold and clinical: avoid them unless you’re lighting a modern minimalist patio.
Power options:
- 12-volt low-voltage transformer systems are standard for DIY. A single transformer powers multiple fixtures via daisy-chained cable. Budget 200–500 watts for a typical Charleston residential landscape.
- Solar landscape lights require no wiring but deliver less consistent brightness in Charleston’s humid, partly-cloudy climate. Reserve them for accent or feature lighting in open sunlight areas.
- Line-voltage (120V) systems deliver brighter output but require buried conduit, often need permits, and pose shock risk. Professional installation recommended: not ideal for DIY.
For most Charleston homeowners, a 400-watt 12-volt transformer with 50–75 feet of cable covers a typical 0.25-acre lot with 8–12 fixtures. Start conservative: you can always add more fixtures later if budget allows. This recommendation aligns with energy-efficient practices for regional homes. Best home lighting resources emphasize that proper fixture selection prevents power waste and maintenance headaches.
Maintenance and Seasonal Considerations
Charleston’s humidity and salt spray demand regular attention. Clean fixture lenses quarterly, dust and salt buildup dim output significantly. Use a soft cloth and distilled water: avoid abrasive scrubbing that scratches acrylic lenses.
Inspect connections seasonally. Corrosion creeps in silently: loosen a connector, clean the terminals with fine sandpaper or a small wire brush, and reconnect with dielectric grease. Do this before summer rain season and again in fall.
Winter brings occasional freezes and heavy rain. Low-voltage systems handle cold fine, but standing water around transformer bases invites mold. Ensure proper drainage and consider raising the transformer on a small platform if your yard pools water. If you winterize outdoor systems, drain hose bibs and disconnect fixtures if they’ll sit unused: otherwise, leave them running on a timer to prevent corrosion buildup.
Summer storms can loosen stakes and shift buried cable. After heavy rain, do a quick walkthrough to ensure all fixtures are upright and cable hasn’t surfaced. Mulch erodes and shifts: reseat cable as needed.
Trim vegetation around uplights and accent fixtures annually. Growing shrubs and vines block light surprisingly fast. A once-a-year pruning keeps sight lines clean. If you’re upgrading your landscape design, review your lighting plan: what worked for a young crepe myrtle may need adjustment as the tree matures. Resources like Southern Living and Better Homes & Gardens offer seasonal landscape maintenance guides tailored to the South.
Finally, test your timer and photocell annually. Many failures happen silently, your lights stay on all night or don’t come on at dusk, wasting energy and potentially signaling an empty home to intruders. A functioning timer and dusk-to-dawn photocell turn lights on automatically and extend bulb life by preventing dawn-hour operation.


