
Recessed lighting has become a staple in modern home design, offering a clean, minimalist look that works in kitchens, bedrooms, hallways, and living spaces. But if you’re planning a lighting upgrade or new construction, you’ll quickly hit a fork in the road: canned or canless recessed lights? Both accomplish the job, but they differ significantly in installation complexity, cost, performance, and long-term maintenance. Understanding these differences upfront helps you make the right choice for your budget, ceiling type, and design goals. This guide breaks down the practical reality of each option so you can move forward with confidence.
Table of Contents
ToggleKey Takeaways
- Canned recessed lights cost $15–$50 per fixture upfront and offer flexible bulb and trim upgrades, while canless recessed lights cost $40–$100 per fixture with integrated LEDs but limited customization.
- Canless recessed lighting is ideal for tight spaces and retrofits since it sits flush against the ceiling and requires minimal overhead clearance, while canned lights need 6+ inches of cavity space.
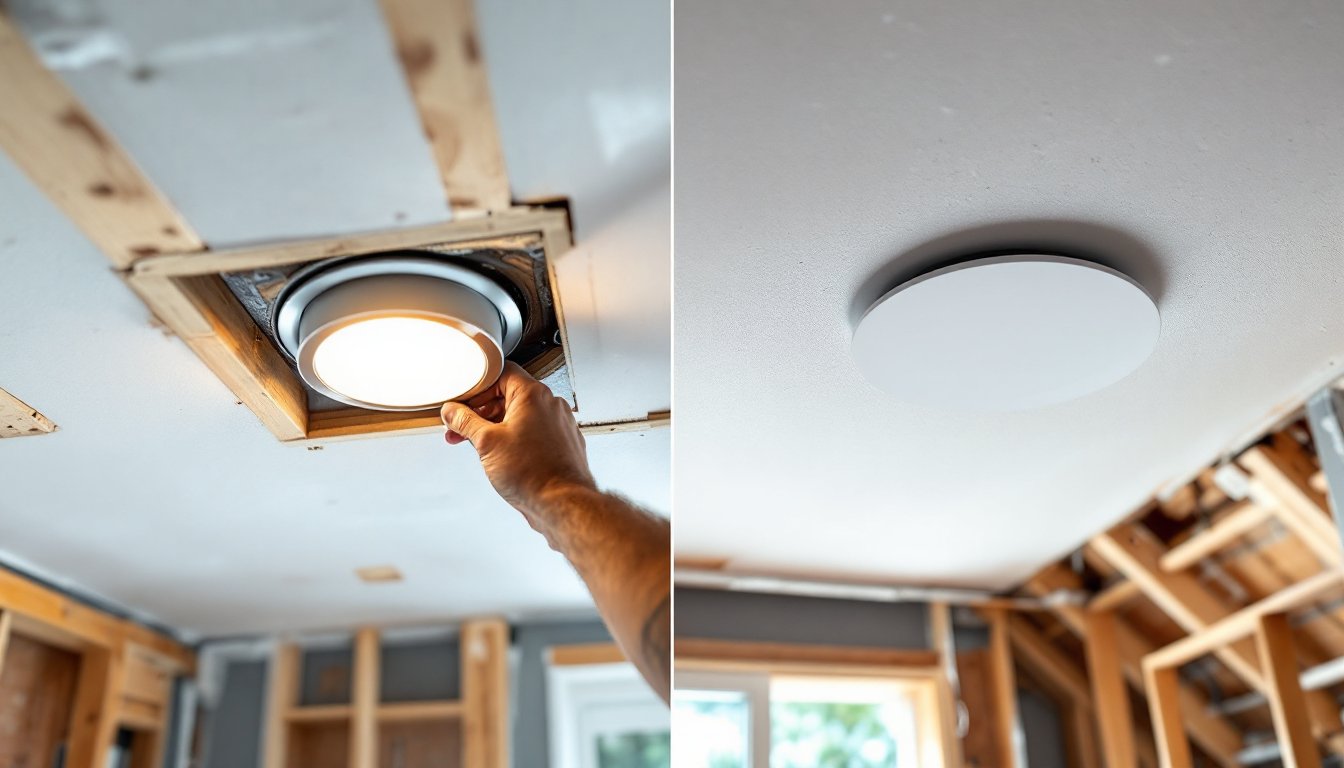
- Canned lights demand more installation time and drywall repair work, especially in retrofits, whereas canless fixtures install faster with less ceiling damage.
- Choose canned recessed lights for new construction with adequate space and budget flexibility, or canless lights for low ceilings and insulated attics where thermal efficiency and space-saving matter most.
- Both LED-based systems last 25,000+ hours, but canned lights allow easy bulb replacement while most canless fixtures are sealed units requiring complete replacement when the LED fails.
- Always hire a licensed electrician for recessed lighting installation to ensure proper wiring, load calculations, and building code compliance—improper installation creates fire and safety hazards.
What Are Canned and Canless Recessed Lights?
Canned recessed lights, sometimes called downlights or can lights, are the traditional option. They consist of a metal housing (the “can”) that sits inside your ceiling cavity, typically between studs or joists. The can holds the trim ring, lamp, and reflector, then directs light downward through your room. They come in standard sizes: 4-inch, 5-inch, and 6-inch diameters are most common, measured by the opening in your finished ceiling.
Canless recessed lights skip the bulky housing. Instead, the driver and LED module mount flat against (or inside) the ceiling drywall, with a thin trim ring sitting flush at the surface. They’re also called LED downlights or trim-less fixtures because they take up minimal space above the ceiling.
Both types now typically use LED bulbs, though older canned systems ran incandescent or CFL. LEDs are standard practice in 2026 because they’re energy-efficient, last 25,000+ hours, and generate less heat, a huge advantage in tightly insulated or attic-adjacent ceilings.
Key Differences Between Canned and Canless Options
Installation and Complexity
Canned lights demand more overhead work. You need to cut a hole in drywall (typically 4–6 inches), route wiring, and secure the can between ceiling joists or use a bracket hanger if no joist is handy. The housing sits inside the cavity, so you’re working above your head in a confined space, standard stuff if you’re used to ceiling work, but awkward if you’re a first-timer. Plan for drywall patching, especially if you’re retrofitting into an existing ceiling.
Canless fixtures are faster to install. You cut the drywall hole, run your wiring, and screw or snap the trim ring into place. The driver and LED module often attach to the back of the trim ring or sit in a shallow recess. No wrestling with a bulky can in a dark joist bay. If you’re doing a retrofit, this means less drywall repair. That said, some canless models require you to fish wiring through existing ceilings, which isn’t simpler, just different.
Cost Comparison
Canned recessed lights typically cost $15–$50 per fixture (housing, trim, and baffle included), plus the cost of the LED bulb or integrated LED module. A basic non-IC (non-insulation contact) can runs cheaper than an IC-rated can, which is required if your ceiling sits directly under an insulated attic. IC cans have built-in thermal protection and cost $25–$60 each.
Canless lights start at $40–$100 per fixture because the LED driver is built in. You’re paying upfront for a sealed, integrated system. But, since there’s no separate bulb to replace later (many canless fixtures are non-serviceable), you avoid future bulb costs. Over a 10–15 year lifespan, the total cost often evens out, but your initial outlay is higher.
Advantages and Disadvantages of Canned Recessed Lights
Advantages:
- Wider trim and bulb options. Once your cans are installed, you can swap trim rings, baffles, and LED bulbs without replacing the housing. Want to upgrade from a soft white to a cool white LED in three years? Easy.
- Lower initial cost per fixture. Standard cans are cheaper upfront, so if you’re installing 20+ fixtures, the savings add up.
- Proven reliability. Canned lights have been the industry standard for decades. Most electricians and contractors know how to install them, and parts are widely available.
- Easy bulb replacement. When an LED fails (rare, but it happens), you twist out the bulb and swap it in. No rewiring or fixture replacement.
Disadvantages:
- Takes up ceiling cavity space. A 6-inch can needs 6+ inches of clearance above your ceiling. In tight attics or low crawlspaces, this is a real constraint.
- Heat accumulation. Even with IC-rated cans, they trap some heat. In well-insulated attics, this can affect ceiling insulation efficiency.
- Longer installation time. Fitting cans between joists, securing brackets, routing wiring, it’s more fiddly than canless alternatives.
- More drywall repair in retrofits. Cutting a larger hole and wrestling the can through means more edge damage, especially in older ceilings.
- Potential for light spillage. If the trim ring and baffle aren’t right, you can see the can’s interior or get unwanted glare.
Building codes vary by jurisdiction, but most require IC-rated cans if insulation sits directly above the ceiling. Non-IC cans must be clearanced from insulation (typically 3 inches), which takes up even more cavity space. Always verify your local code before ordering.
Advantages and Disadvantages of Canless Recessed Lights
Advantages:
- Compact and space-saving. Canless fixtures sit flush or just behind the drywall surface, freeing up precious cavity space. Ideal for low ceilings, shallow joist bays, or attic retrofits.
- Faster installation (usually). Fewer parts to assemble and secure above your head translates to less labor time.
- Better for insulated ceilings. Because they sit at or near the surface, there’s minimal thermal interaction with attic insulation. No heat trapping.
- Integrated LED means consistent color. The driver and LED are matched at the factory, so you get reliable color temperature and brightness.
- Sleeker aesthetic. A super-thin trim ring looks modern and minimalist. The fixture almost disappears.
Disadvantages:
- Higher upfront cost. You’re paying $40–$100+ per fixture because the LED and driver are built in. Scale that to 15 lights, and the budget jumps fast.
- Limited trim/bulb customization. Once installed, you’re stuck with that trim ring style. If you want to change the look later, you replace the whole fixture, not just the trim.
- Non-replaceable LEDs. Most canless fixtures are sealed units. When the LED fails, you replace the entire fixture. This shifts the cost and e-waste burden to later.
- Potential for thermal issues in service. If the driver sits in a hot attic, longevity can suffer. Quality matters here, cheap canless fixtures overheat faster than premium canned + LED combos.
- Less installer familiarity. Older contractors may be slower with canless systems, which can inflate labor costs.
Research from home renovation forums shows that canless systems work beautifully in retrofit scenarios where space is tight, but require careful electrical planning if you’re chasing wiring through existing framing.
Which Option Is Best for Your Home?
Choose canned lights if:
- You have adequate ceiling cavity space (6+ inches clearance above drywall).
- You want flexibility to upgrade trim and bulbs without touching the housing.
- You’re on a tight initial budget or installing many fixtures.
- Your ceiling is new construction and you’re not pressed for overhead clearance.
- You value having widely available replacement parts and multiple installer options.
Choose canless lights if:
- Your ceiling is low, shallow, or hemmed in by HVAC ducts and other utilities.
- You’re retrofitting into an attic where every inch of clearance matters.
- You want a seamless, minimalist look with a thin trim ring.
- Your insulation sits directly above the ceiling and you want zero thermal interference.
- You prefer simplicity during installation and don’t mind the higher upfront cost.
Consider your living room recessed lighting layout when deciding, too. If you’re designing a bedroom or bathroom with limited ceiling height, canless might prevent awkward fixture placement. For open-concept kitchens and living spaces where you have room to work, canned lights offer flexibility and cost savings.
If you’re unsure where to start, consult placement strategies for your specific room. You’ll often find that once you map out fixture locations and ceiling constraints, the choice becomes clearer. Many professional home renovation guides recommend mixing canned and canless systems in the same home, canned in high-clearance areas and canless in tight spots, for the best balance of cost and function.
One critical safety note: Recessed lighting requires proper electrical work. If you’re not comfortable running new 14/2 or 12/2 wire, securing junction boxes, or understanding load calculations on your circuit breaker, hire a licensed electrician. A miswired fixture can overheat, trip breakers, or become a fire hazard. Building permits are often required for new circuits, and an inspector should verify your work before you close up the ceiling.


