
Landscape lighting can transform your yard from dull to stunning, but none of it works without solid connections. A loose connector, corroded terminal, or mismatched voltage is the difference between a year of flawless ambiance and a flickering, frustrating mess. Whether you’re running landscape lighting connectors across your patio, along a garden path, or around your deck, knowing how to choose the right ones and install them correctly saves headaches, repair costs, and wasted time troubleshooting. This guide walks you through everything you need, from identifying connector types to installation and maintenance, so your outdoor lighting stays bright and reliable season after season.
Table of Contents
ToggleKey Takeaways
- Quality landscape lighting connectors are essential for preventing corrosion, water intrusion, and voltage loss that can cause dimming, flickering, or complete fixture failure.
- Push connectors and sealed terminal blocks offer superior waterproofing and reliability compared to twist-on connectors, with IP67 or IP68 ratings recommended for outdoor use.
- Proper installation of landscape lighting connectors requires matching wire gauges, stripping ½ inch of insulation, securing connections to prevent strain, and applying waterproof sealant in wet climates.
- Annual inspections for oxidation, water intrusion, and loose connections can catch and prevent costly failures, while stainless steel or copper terminals provide better corrosion resistance in harsh environments.
- Keeping spare sealed connectors on hand and using a lighting layout tool to minimize connection points reduces future maintenance issues and extends the lifespan of your outdoor lighting system.
What Are Landscape Lighting Connectors And Why They Matter
Landscape lighting connectors are the small but critical junctions that link your power supply, wiring, and fixtures together. Think of them as the nervous system of your outdoor lighting, if they’re weak or corroded, the whole circuit suffers.
These connectors come in different styles and ratings, each designed for specific voltages and environmental conditions. In residential landscape lighting, you’re almost always dealing with low-voltage systems (typically 12V or 24V), not mains power. Low-voltage systems are safer to work with, easier to install, and far more forgiving if you accidentally touch a live wire.
Why do connectors matter so much? Poor connections introduce resistance into your circuit, which reduces voltage to your fixtures and causes dimming or failure. Water intrusion is another killer, landscape connectors sit outdoors year-round, exposed to rain, snow, dirt, and temperature swings. A corroded connection fails silently, sometimes leaving half your lighting setup dead while the other half limps along. Quality connectors with proper sealing and corrosion-resistant materials prevent these failures and keep your system reliable. Good connectors also mean faster installation and easier maintenance down the road. You’ll spend a few extra dollars upfront but save frustration and repair calls later.
Types Of Landscape Lighting Connectors
Low-Voltage Connectors
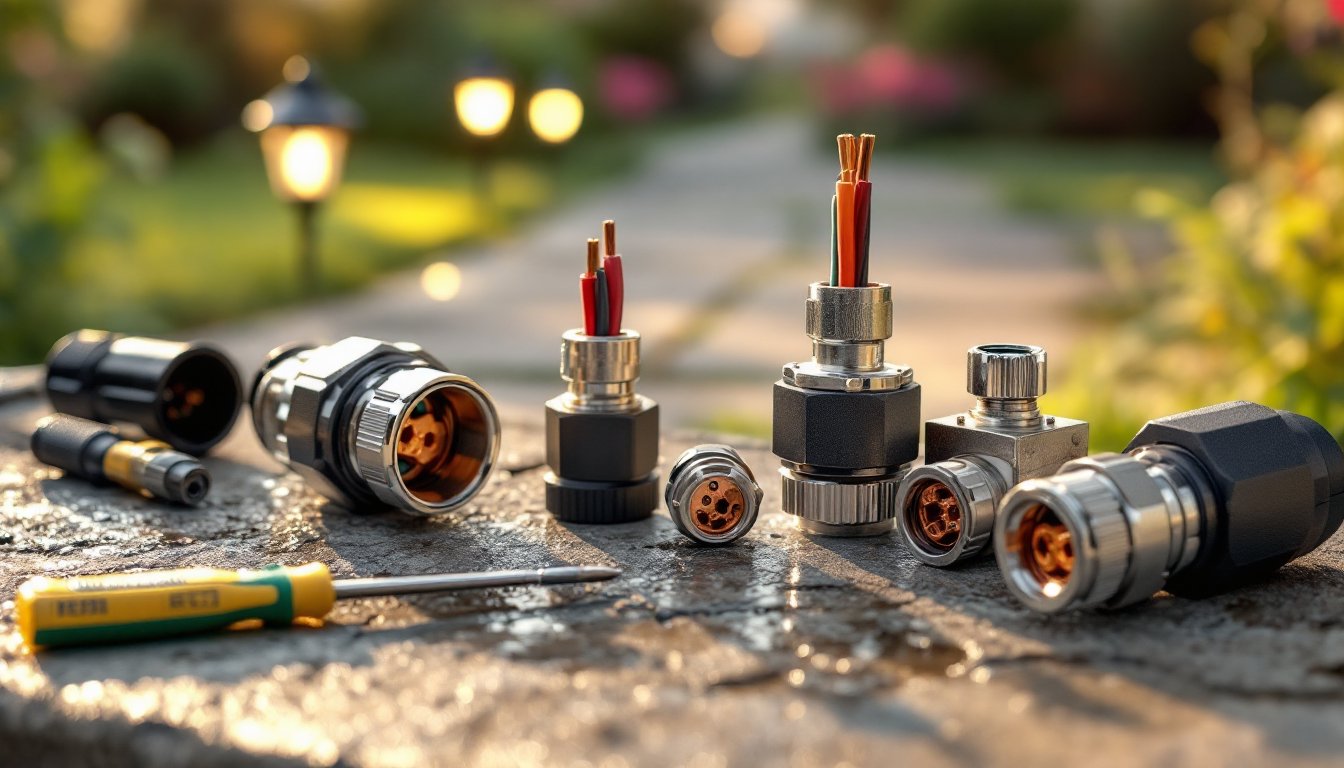
Low-voltage landscape connectors come in several styles, each with pros and cons. The most common are twist-on wire connectors (sometimes called wire nuts), push connectors (also called quick-connect or snap connectors), and terminal block connectors.
Twist-on connectors are cheap and familiar, but they’re not ideal for outdoor work. They don’t seal well against moisture, and vibration from wind or foot traffic can loosen them over time. You’ll find them on some budget fixture sets, but pros avoid them for permanent installations.
Push connectors (like those from Wago or similar brands) are waterproof when properly rated and much faster to use. You strip the wire, push it in, and you’re done, no twisting, no guessing at the right tightness. They’re reliable outdoors if you buy ones rated for UV exposure and moisture. Many installers now prefer these for landscape work.
Terminal block connectors offer the most robust connection. You loosen a screw, insert the wire, and tighten the screw to clamp it. They’re overkill for small fixture connections but excellent where multiple wires meet or where you need maximum reliability. They’re bulkier, though, so less common in tight fixture housings.
All low-voltage connectors should be rated for the amperage your circuit draws. A typical transformer powers multiple fixtures: check the transformer’s output (usually 100–300 watts) and calculate total current. For a 12V system, divide watts by 12 to get amps. A 120-watt transformer draws 10 amps, so your connectors need a 10A or higher rating.
Waterproof And Weather-Resistant Options
Outdoor connectors must seal against water, so look for ratings like IP67 or IP68 (where the first digit is 6 or higher for dust: the second is 7 or higher for water immersion). Standard indoor connectors won’t cut it.
Rubber boot connectors have a flexible rubber cover that slides over the connection once it’s made, creating a water seal. They’re cheap and work for light-duty use, but they deteriorate in UV sunlight over a few seasons. Budget for replacement.
Sealed push connectors (like IP68-rated Wago connectors or landscape-specific brands) are sealed at the factory and stay sealed. They cost more upfront but outlast rubber boots by years. The seal is permanent and doesn’t degrade from UV.
Gel-filled connectors use a silicone or dielectric compound inside the connector housing to displace water and prevent corrosion. They’re excellent for humid climates or areas where connectors sit in standing water. They cost more but are worth it if your yard is wet or salty (coastal areas).
Copper and stainless steel terminals resist corrosion better than bare brass or aluminum. If your area has acidic rain or you’re near salt spray, stainless terminals are the smart choice. Check the spec sheet, it’ll state the material.
How To Install Landscape Lighting Connectors Correctly
Installation is straightforward if you follow a few simple rules. Prep work makes or breaks the connection, so don’t skip it.
Step 1: Turn off power. Always disconnect the transformer or turn off the circuit breaker before touching any connectors. Even low-voltage systems can arc if you’re connecting live wires.
Step 2: Strip the wire correctly. Use a wire stripper to remove about ½ inch of insulation from each conductor. Don’t strip too much, bare copper exposed to moisture will corrode. Don’t strip too little, or the connector won’t grip properly. If the wire is damaged or kinked, cut it off and start fresh rather than forcing a bad connection.
Step 3: Match the wire gauge. Landscape wiring typically runs 10, 12, or 14 gauge depending on run length and fixture load. Connectors are rated for specific gauges, check the package. Forcing a 12-gauge wire into a 14-gauge connector or vice versa creates a loose, unreliable connection.
Step 4: Use the right connector type. For twist-on connectors, push the wires into the connector and twist clockwise until snug. Don’t overtighten, you’ll strip the wire. For push connectors, insert the wire straight in until it seats. For terminal blocks, loosen the screw, insert the wire, and tighten firmly with a screwdriver.
Step 5: Seal and protect the connection. If using twist-on or exposed terminal connectors, apply a waterproof connector gel or silicone caulk around the connection. For push connectors with built-in seals, this step is optional but recommended in wet climates. If the connector has a rubber boot, slide it over the connection until it seats fully.
Step 6: Support the connection. Don’t let the connector dangle by the wire weight alone. Secure it to a post, stake, or fixture housing with a cable clip or zip tie. This prevents strain on the connection and reduces water pooling.
Step 7: Check polarity. For fixtures with separate positive and negative leads, match the wire colors or markings. Reversing polarity on some LED fixtures can damage them. If wires aren’t color-coded, mark them with electrical tape before disconnecting the old fixture.
Common mistakes to avoid: using indoor connectors outdoors, mixing wire gauges, overtightening terminal screws (which damages the wire), and leaving connections exposed to standing water. If a connection sits in a low spot where water pools after rain, relocate it or add a small drainage channel.
Use 12 Volt Lighting systems to ensure you’re working with proper low-voltage components from the start. Most landscape lighting kits come with connectors included, but if you’re building a custom system, buy connectors that match your wire gauge and transformer output.
Maintenance And Troubleshooting Tips
Outdoor connectors need regular checks, especially in harsh climates. Once a year, inspect all connectors for corrosion, water intrusion, or looseness.
Visual inspection: Look for green or white crusty buildup (oxidation) on terminals, or dark discoloration on rubber boots. A little surface oxidation is normal: use a soft brush or cloth to gently clean it. If oxidation is heavy or the connector feels spongy, replace it.
Water intrusion: If you see moisture inside a connector housing, the seal has failed. Disconnect it, dry the wires and terminals with a cloth, apply dielectric grease, and reconnect. If the problem persists, the connector is compromised, swap it for a new one.
Loose connections: Over time, vibration and temperature cycles loosen terminal screws. Tighten them with a screwdriver, but don’t force it. If a screw spins without tightening, the connector is stripped and needs replacement.
Dimming fixtures: If one or more fixtures are dimmer than others, a loose connection is the culprit. Start at the transformer and work downstream, checking each connector. A volt meter helps, measure voltage at each connection point. A significant drop between connections signals resistance from corrosion or poor contact.
Fixtures won’t power on: Before assuming a fixture is dead, check the connector first. Disconnect and reconnect it. If the fixture fires up, the connection was corroded. If not, move to the next connection upstream until power returns. Once you locate the bad connector, replace it.
Seasonal maintenance: Before winter, inspect all connectors and apply a protective coating of dielectric grease to any that look weathered. In spring, clean debris from around connector housings so water can drain freely. In coastal areas or near salt sources, rinse connectors with fresh water after storms to remove salt residue.
Using a Lighting Layout Tool helps you plan fixture placement and run distances upfront, which reduces connection count and makes future maintenance easier. Fewer connections mean fewer points of failure.
Keep spare connectors on hand, a few sealed push connectors or terminal blocks cost under $20 and save a service call when one fails. Stock them in a dry place indoors so they’re ready when you need them.
Conclusion
Landscape lighting connectors aren’t glamorous, but they’re foundational to a reliable outdoor lighting system. Choosing the right type, installing them correctly, and maintaining them regularly keeps your yard bright and trouble-free. Quality sealed connectors cost a bit more upfront, but they outlast cheap alternatives and prevent the frustration of dim, flickering, or dead fixtures. When you’re planning your next landscape lighting project, budget extra time for proper connector selection and installation, it’s the difference between lighting that works every night and lighting that becomes a weekend chore.


